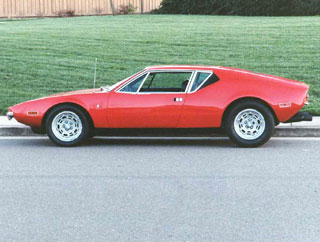
Cal's Pantera before the restoration
Click images to view
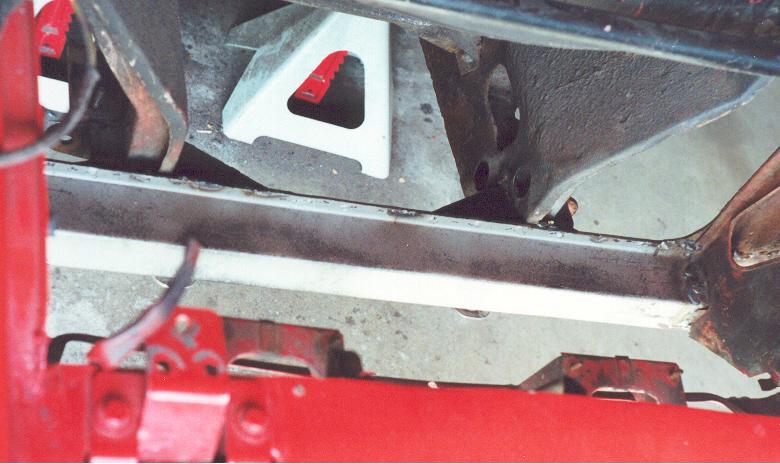
This photo shows the intermediate steps to my valance panel restoration. As you can see, I’m not advanced in hammer welding. But the backing plate and the new crossbrace are firmly welded in place and are in the correct positions. I managed to created the "lip" across the top of the crossbrace. That was a hard one. It took two welding clamps and a sheet metal hammer to get it right. The crossbrace was fabricated from scratch by a local metal shop. I didn’t close off the ends as the factory had done. This is unwise as any moisture needs an exit point.
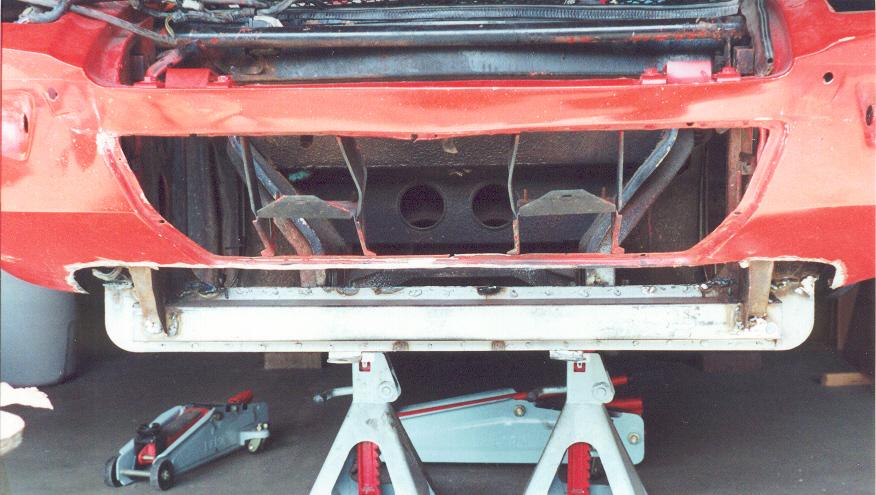
This is the crossbrace in all it’s glory. I’m really proud of this! Note that that radiator supports aren’t on yet. As of this writing, they are. I "mounted" the radiator back on and marked the areas where the mount tabs were supposed to go. They are now fully welded on and POR’d.

This is the passenger side photo of the wheelwell. Look toward the front and you will see where the new backing plate was welded in. I cut just where the metal made the turn that parallels the ground. All that area below the weld was rusted. I poked a hole in the old backing plate (as it was rusted) and literally a quart milk carton full of rust was dug out.
This photo is of the passenger side rear rocker panel. Notice the large rust hole.
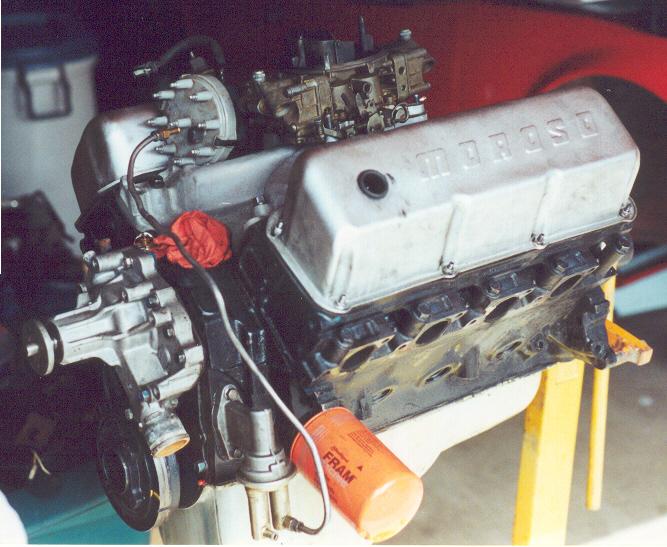
This is the photo of John Parson’s old "fun engine". I got the dyno sheets. 301.5 RWHP at about 5 grand. O/C 2V heads milled down to 10.5:1 comp ratio along with a Holley Street Dominator intake milled out to port match the heads. Manley rollers. I’m going to remove the tall Moroso valve covers and replace them with a pair of Ford Motorsport 351C units that I got on the SAAC net. Block will be painted that Ford Corporate blue. I’m need this engine to look good next to my newly blueprinted ZF.
Here are two items of note: remember that 351M that I wanted worked on? That’s her. The bad thing is the lowest sonic check in one of the cylinders was 75/1000 in. That’s too thin in my book so now she does yeoman service as an anvil/general worktop.
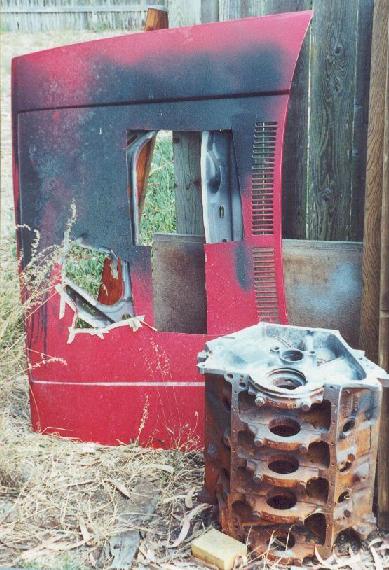
That cut up VW hood was given to me from the autobody shop just a stone’s throw away from my house. No, those aren’t blower cutouts. I chopped those out for sheet metal to use on #2428. Part of it now resides in the passenger side rear wheel well area where they used to be rust and the rest reside in place of the banged up metal caused from a busted half-shaft.

Ah, the "crowning achievement" of the front valance restoration is a fully restored valance panel. You may not see it too clearly (and that is very good!): from the oval holes down to the plywood table is my metal replacement. I bought sheet metal from the local hardware store and chopped it to length. I ended up welding some butt sheeting and later filled it in. Gee, what is that black stuff on it (the paint?). If you have been following my posts, you know I get my "commission" on POR-15. Just kidding on the commission but POR-15 is fantastic stuff. Because Detomaso didn’t pay attention to this area and essentially left the metal unprotected, you will see that the majority of the "Ford year" Panteras suffered from rust in this area. Of course, the oval holes back to the rear panel rusted out (especially if you had radiator leakage, driving through rain/water, and the all present curb rashes and scrapes). I painted this area inside and out with POR-15 as I don’t want to have this area rust out again. It took me approximately a months worth of work to do the job. I’m happy to report that as of this writing, the valance is completely in, POR’d, and ready for a skim coat of filler. You will not see this when the car is painted.
Cal
To be continued soon!