Since upgrading my ignition system to a Pertronix Ignitor III I've been working on optimizing the ignition timing. As every Pantera owner knows taking the firewall out each time you want to make a timing change is a bit of a pain. I decided to mark my flywheel so I could check the timing through the bell housing inspection window.
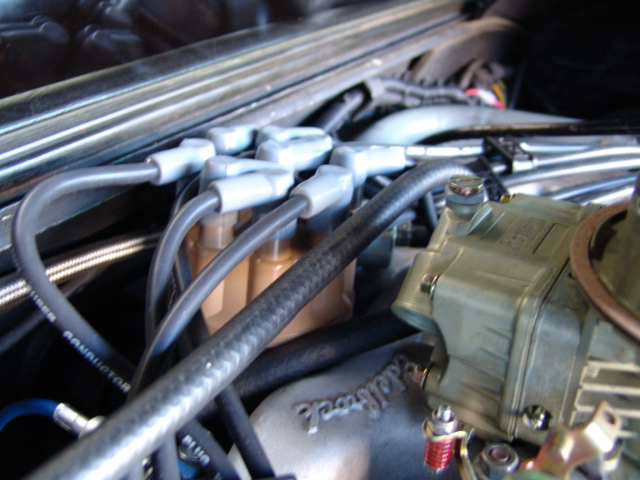
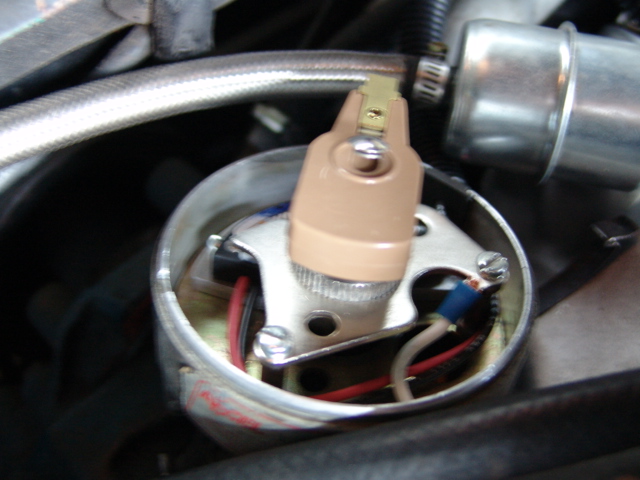
The first step was determining the position on the number one cylinder spark plug wire in the distributor cap, so I could tell when I had number one cylinder at TDC (Top Dead Center). Each car could have the number one spark plug wire in a different place in the distributor cap, it all depends how the distributor was installed and where the wiring sequence was started.
Next, I removed the firewall so I could turn the engine to TDC or 0 degrees on the damper timing marks. Instructions for removing the firewall can be found here.
I connected my remote starter switch to the starter solenoid so I could bump the engine around near TDC 0 and with the distributor rotor pointing to the number one position. After I got it close I put the transaxle in 1st gear and by pushing (rocking) the car a bit I was able it easily align the 0 marker with the pointer. It is hard to get a good view of the pointer and the timing marks and I found that looking from the front of the damper and sighting the position of the pointer over the 0 mark worked best. All of this assumes that the damper timing marks are correct.

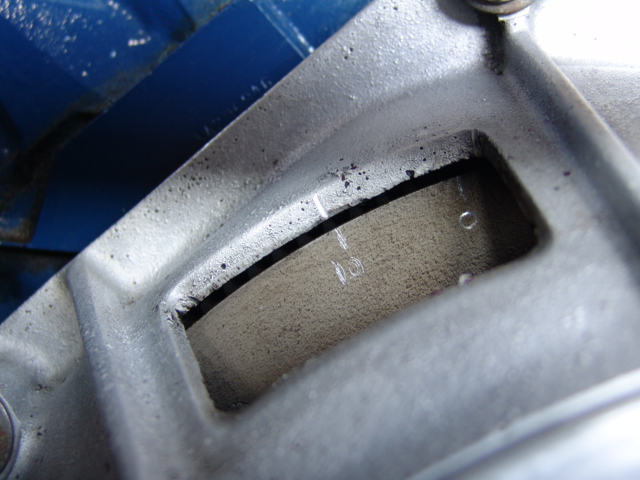
The next step was filing a narrow notch in the front top edge of the inspection window with a fine file. I used the file tip to carefully scribe a line in the top face of the flywheel and the degree. I continued this process for 10, 20 and 30. My damper does not have a mark for 40 so I projected a 40 degree mark on the flywheel by using the distance between the flywheel 20 and 30 mark.
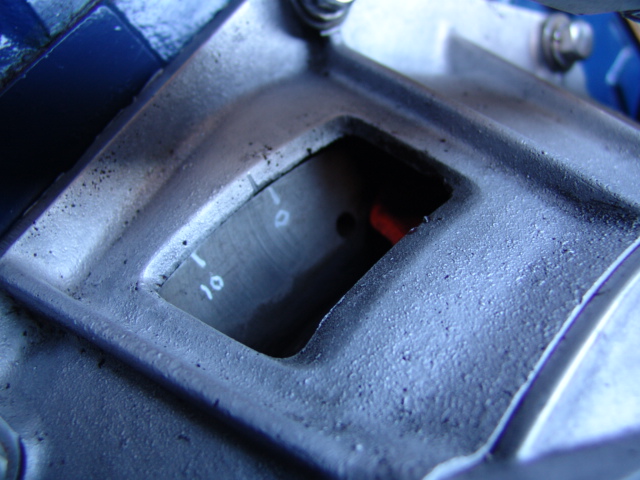
After scribing the flywheel, I cleaned the area with lacquer thinner and painted over the scribes with white enamel paint. In this view, 10 is painted and 0 has not been painted yet.
I found that the power terminal on the electric choke worked well for a convenient timing light power source. The timing is strobe from under the wheel house brace giving a straight on view of the timing marks.
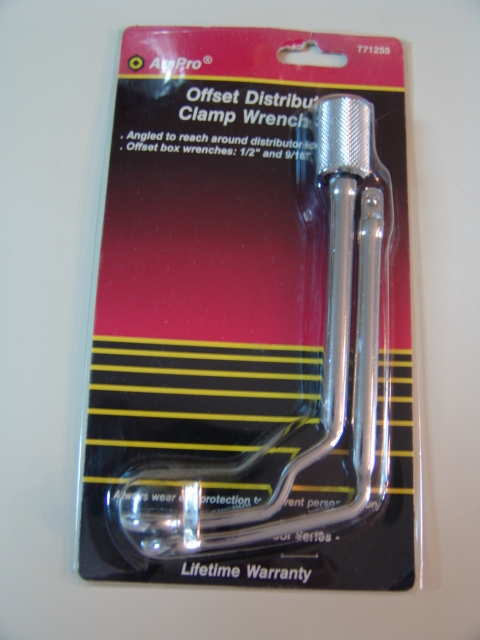


The next step was locating a distributor wrench that would work on the Pantera with the limited space available. I found one that works perfectly from Advance Auto. The AmPro tool number is T71255.
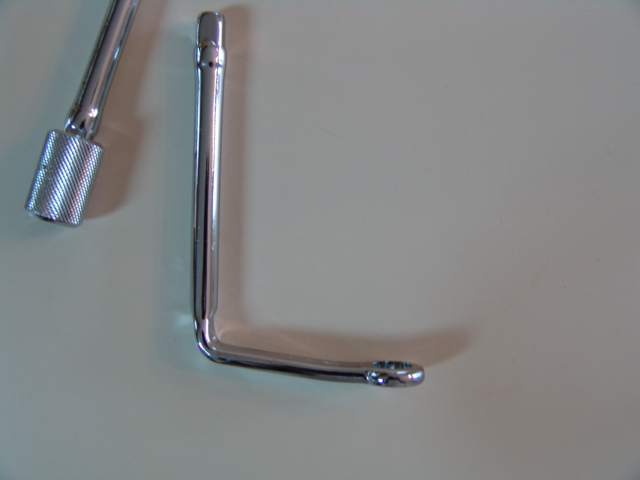
The lower part of the wrench needs to be bent, so the bottom of the box end is 90 degrees to the shaft. This change makes it fit between the firewall and the side of the distributor.
The 10 through 40 marks are not needed if you have a dial back timing light. I still have and use my made in the USA 70s vintage timing light so I needed all the marks.
After transferring the timing marks to the flywheel I spent a little time playing with the initial timing and looking at the total timing. It is so much easer with the flywheel timing marks!
George Pence (Pantera International) was discussing his method of setting the initial timing and it reminded me of how we did it back in the day when I couldn't afford a real timing light. The one I had was powered from the spark plug wire and it didn't work very well.
George said "with the motor warmed up to normal operating temp, and idling in the driveway, all vacuum connections connected to the distributor, slowly twist the distributor in the advance direction. As you do so the idle speed shall increase. Keep twisting slowly until the idle speed just reaches the point where it no longer increases, this is the ideal ignition advance for idle. This setting will also result in the highest intake manifold vacuum, and can be set with a vacuum gauge just as accurately as a tachometer. This can be a problem with high compression motors, making them hard for the starter motor to crank, but with your cobra jet motor it is not a concern. Low speed power, throttle response, drivability will all improve. Your motor will also have less of a tendency to overheat when idling (more heat being converted to work, less heat load on the cooling system)."
Needless to say some caution must be used because you do not want your engine detonating and blowing a hole in a piston. My Accel distributor is a centrifugal advance only, so I don't have vacuum lines to deal with.
With my timing light hooked up and the engine warm, I slowly turned the distributor in the advance direction (clockwise) and the RPMs came up all the way to 20+ degrees. I set the initial back to 15 degrees to be safe and the total is around 35 degrees. This all assumes that the damper marks were correct. So far, the engine starts fine, with no kick back and no detonation. I have 71 closed chambered heads, a mild cam and I'm running 93 octane fuel. I don't know what pistons are in the engine so I don't know the compression. The engine really responded to the advance and I'll run it for awhile before I add more. Looks like for the last 12 years I've been missing some HP.
.