I have tried just about every ball joint tool that is sold. None are satisfactory. If you don't care about the ball joints, a pickle fork/ big and hammer is the cheapest and the best. But I don't like to use hammers.
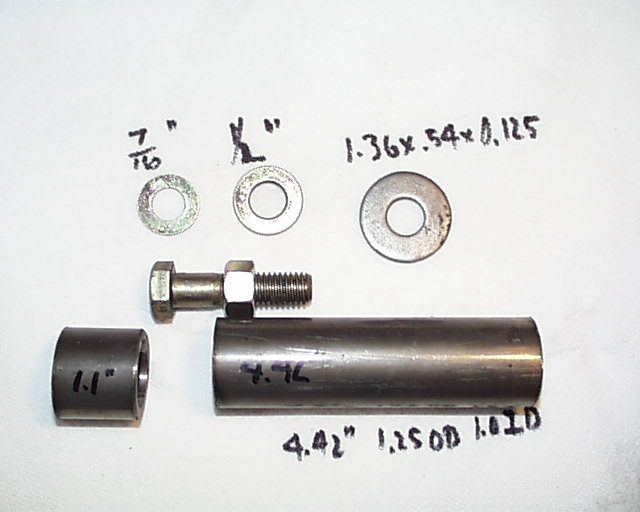
The tool consists of two pieces of tubing, three washers, a bolt, and a nut. It will easily separate Pantera front ball joints with the spindle either on or off the car. No hammer required. The parts of this tool were all items I had available. The dimension are not critical as long as you can install the tool correctly.
Here's how
the tool is used.
Remove the cotter pin from the object ball joint. Remove the ball joint
nut.
Flip the nut over and thread it back
on the ball joint stud until it is
flush with the end of the stud.
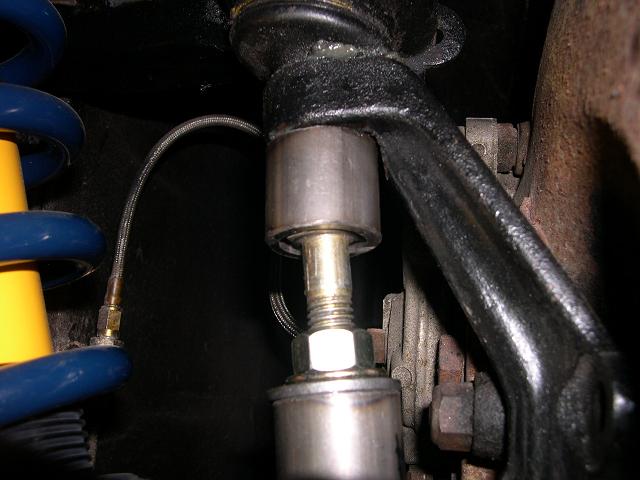
Place the small piece of tubing over the stud/nut
so it bears against the flat part of
the spindle. This tubing will keep the
tool from slipping off the stud/nut.
Insert the 7/16 inch washer so it rest
against the stud/nut. This washer
keeps the stud/nut from getting buggered up.
With the nut remaining on the ball
joint stud, the ball joint will be
retained in the spindle when it
separates.
Screw the 1/2 inch nut all the way onto the 1/2 inch bolt. Install the
1/2
inch washer on the bolt. Install the
larger washer on the bolt. The 1/2 washer
is to fit the head of the bolt, the
larger washer is to fit the OD of the
tubing. Slide the long piece of
tubing over the ball joint stud/not you are not
removing. Fit the threaded end of
the 1/2 inch bolt/nut/washers into the
long tube and position it inline
with the short tube. Unscrew the nut while
holding the 1/2 inch bolt. The bolt
will just move into the end of the short tube
and bear against the ball joint
stud/nut you want to remove. Using a
visegrip to hold the bolt and
a wrench to unscrew the nut, apply pressure until the
ball joint separates.

The ball
joint separation will be accompanied by a substantial bang. But the
ball joint will not fly out, the
tool will not fly out, the ball joint and
it's rubber bootie will be
unharmed, and you will not need to smash anything
with a hammer.
When you have loosened the first ball joint, leave the first ball joint
in
place on the spindle, screw the nut
all the way back onto the bolt, flip the
tool end for end, and remove the
second ball joint.
This simple tool removed the front ball joints which have been in place
on
my '74 for 35 years with no sweat,
no swearing, and no injuries.