The Pantera Place
"Your de Tomaso
Connection"
Converting a Pantera "L" Bumper to Euro Style Bumperettes
by: Thomas Bechtel
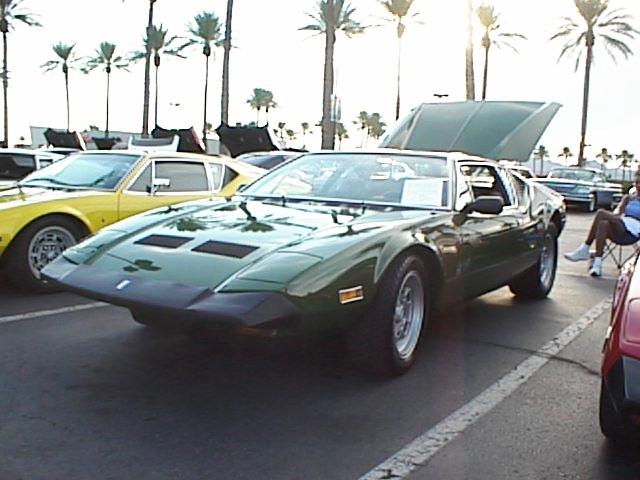
So you’ve decided to take the plunge, and convert your "L" bumper to the euro style bumperetts. It sounded like no big deal to me, so I said why not. Besides, I really liked that look. Here is the story. First off, like many other repairs or modifications be prepared for the unexpected, and possibly a dose of "I’ve gotten into more than I expected".
With that recommendation, let’s break up the modification into three parts:
1) Existing bumper and hardware removal
2) Metalwork and finishing, (and more hardware removal)
3) Fitting new bumpers, replacing hardware.
1. Existing bumper and hardware removal
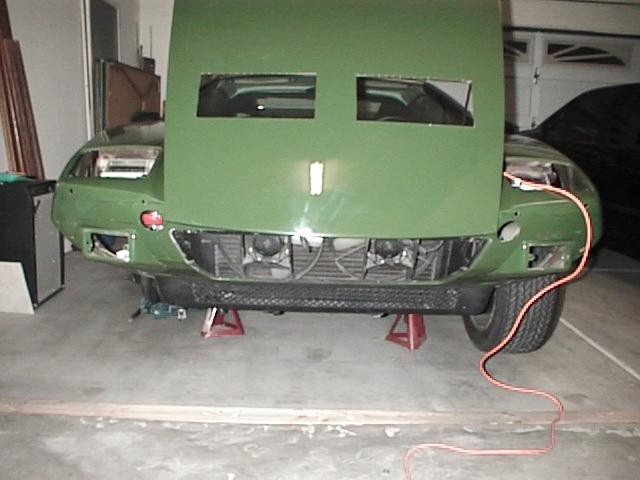
Removal of the L bumper is pretty straight forward. To gain plenty of access, it’s best to raise the front end up on jack stands. Remove the front wheels (not absolutely necessary, but it’s worth the added access). Remove the forward splash shield. (three sheet metal screws each). Now is a good time to raise the headlights. Turn off the ignition, to keep them locked in the up position. Turn off the lights. Now, move to the front of the car, and pry out the two large screw covers on the bumper, which reveal the main bumper mounting bolts. Remove the two large bolts hiding behind the bolt covers you just pryed off, and mysteriously the bumper defies gravity and remains in place. That’s because there are four additional small diameter studs which exit the bumper and go through the car’s sheet metal, holding the bumper in place. Reach around, through the area where you removed the forward splash guards, and twist of the four nuts, which hold on the bumper. Pull forward on the bumper, and off it comes. The car looks better already.
Now, time to remove the bumper shocks. Reach up under the forward splash guard area again, and you will find two hefty bolts that attach the shocks to the frame.
Twist those babies off, and you are done with hardware removal. So far, a piece of cake.
2. Metalwork and finishing:
This was the tough (and costly) part. Seeing that I had no experience in complex body work, I left it to the pros. Once you remove the bumper, there will be four small diameter holes, and two golf ball size holes that must be filled, finished and painted. After going to several custom houses, the consensus was the same...Butt weld a filler piece for the larger holes, and use a "built up" weld for the small holes. Any other solution could leave a moisture path, causing potential rust. In order not to turn the "welder guy" in to a contortionist, there must be easy access to backside of the sheet metal, where the holes are...out with the headlights. TIP, Do not disassemble the headlights...remove as a unit. Get back under the car, with the lights still in the up position, and you will see four attaching studs which attach the headlight assembly to the lifting mechanism. Unplug the headlight from the wiring harness, and remove the four attaching bolts, carefully. Do not let the light slip on to the fender/hood paintwork. Repeat for other light. Lots of room now!
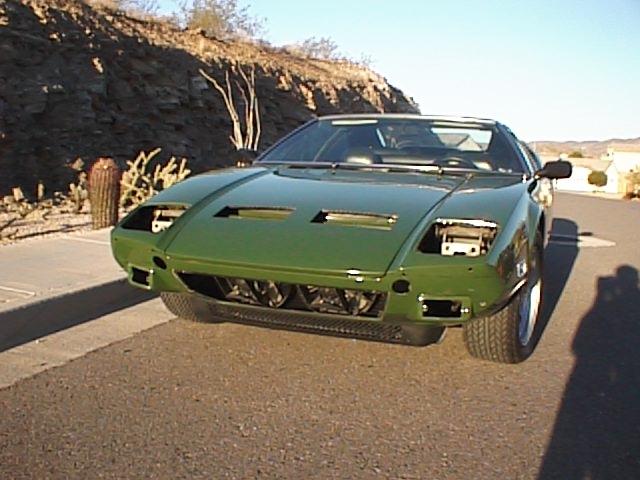
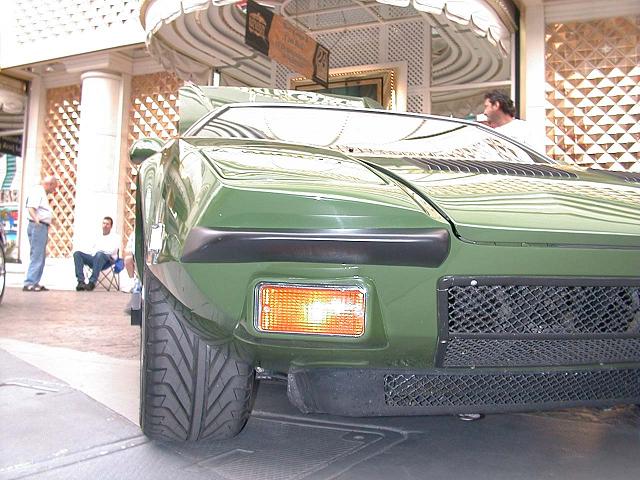
Now the unexpected part...the four small holes that need filling are critically close to the topside sheet metal. A little too much heat, and bingo bongo the top of the fender will need refinishing. Exactly what happened to me. The holes were simply to close to avoid it. Pity, as it added about $1000 to the price tag. You see, if you simply "spot in" the damage on the fender top side, it will not match perfectly. So the fender(s) must be re-shot. Now the hood did not look exactly matched, so I had it re-shot also. Not absolutely necessary, but I wanted it perfect. The front valence area was painted, and the paint was complete. See the finished product, picture

3. Fitting new bumpers, replacing hardware:
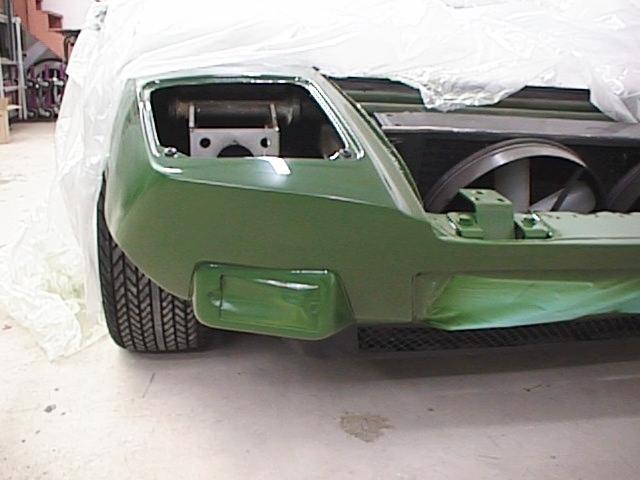
There are several vendors which sell the bumperetts. Some are metal, some fiberglass. I went with Marino at Pantera East. Reason being, his are fiberglass, and are sold barebones with no mounting hardware. No problem, I figured if there was any fine tuning the shape, I could simply file them. And file I did...at least 15 hours of filing! File a little, go fit... File a little, go fit. Each car is different, so the new bumpers are only a rough fit. They do come with a "body to bumper" sealing gasket which can take up some of the slack for an imperfect fit, but they looked hideous. "No go" on the gaskets. A hand fitted perfect fit was the only answer. The bumpers were then, primed, leveled, and sprayed semi flat black.
Next comes the mounting. You are on your own. The bumpers are basically a fiberglass shell. They have a triangular shape on the inside, and are empty. I fabricated a triangle made out of ½" wide stainless flat stock.( 1/16" inch thick) I bent it in a vice, using a hammer, crude but it worked fine. This triangle fit snuggly inside the bumper, shaped to fit it exactly. On the flat piece of the triangle which would rest against the cars body, I drilled a hole which was centered. I passed a 3/16" bolt through the triangle bracket (through the new hole) so that the stud part of the bolt faced the car. I made two brackets per bumper, each fitted about 1 ½" from the ends of the bumper. These should be more than enough mounting strength. Each new bracket was JB welded into the fiberglass bumper. Then the bolt pattern was transferred to the bodywork. I drilled half inch holes in the body, allowing for a little side to side play to line things up. The nuts were attached from the backside, up under the fender wells, and the new bumpers were on, and looking great.
Last item was to replace the headlights. BE CAREFUL...there is a lot of fine tuning to get them back in for a perfect fit. What ever happens, DO NOT close the headlight doors until you are absolutely sure the fit is perfect...or bye bye paint job! It’s not too hard. First set the light assembly back into the mounting bracket and replace the four nuts. Only hand tighten. This will begin the rough fit. Next, from the top side, twist the manual headlight operating knob until the lights are about 1" from closed. This takes forever, as the gearing ratio is extremely low. One twist equals about a quarter inch of movement. Have patience.
Now look closely at all four corners at the topside of the light door. Will it fit into the body recess without touching? Probably not. Move the assembly so it lines up. Close the light door a little more. Again look at all four corners of the light door, especially the corners closest to the cockpit. Will they line up with the body recess? I got nervous at this point...and masked all edges of the headlight door with tape, in cost about case something touched. Close the light door a little more. It should be closed at this point, without touch anything. Tighten the mounting bolts underneath firmly, but not tight. Open the lights up manually just a bit, close them again. Up and down, until its perfect! Cinch the nuts, plug in the harness, Replace the splash shields.
The total job cost about $2000, all said and done. Bodywork, welding, bumpers, and paint were included. My labor was free. A bit more costly than I expected, but what a great looking modification.
Completed job.

Chris Papendorf photos